How to Save Monstera Root Rot: Step-by-Step Guide
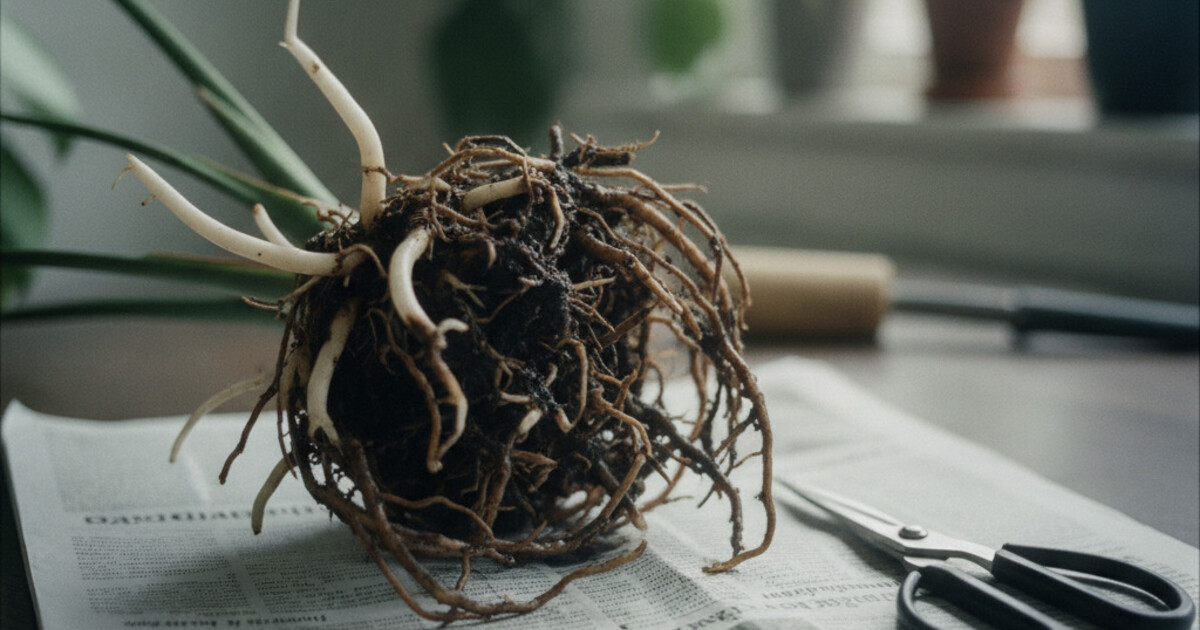
Your monstera looked fine last week. Now the leaves are yellowing, the plant droops even though the soil is wet, and there’s a faint sour smell coming from the pot. These are the classic signs of monstera root rot, and they show up fast once the damage is done.
Root rot doesn’t always mean the plant is finished. If you catch it before the rot has taken more than half the root system, you can cut away the damage, treat the roots, and repot into something that won’t cause the problem again. This guide walks through every step, including how to read the signs, how to treat the roots correctly, and what to change afterward so it doesn’t come back.
Quick answer: To save monstera root rot, unpot the plant, cut away all black or mushy roots with sterilized scissors, and soak the remaining roots in diluted hydrogen peroxide for 5 minutes. Repot in fresh well-draining soil with good drainage. Most monsteras recover in 4 to 8 weeks if at least a third of the root system is still firm and white.
What Causes Root Rot in Monstera Plants
Root rot sets in when soil stays saturated long enough to cut off oxygen to the roots. Without oxygen, root cells begin dying, and that creates the conditions fungal pathogens need to take hold.
The main culprits in monstera root rot are Phytophthora, Pythium, and Fusarium species. Phytophthora and Pythium are oomycetes (water molds) that produce motile zoospores capable of colonizing new root tissue within 24 to 48 hours in saturated soil. Fusarium moves more slowly but embeds deeper into vascular tissue, making it harder to cut away cleanly. Monstera deliciosa is particularly susceptible because its dense root mass traps moisture close to the crown, where rot spreads to the stem. Pathogen activity peaks at soil temperatures between 60°F and 80°F (15°C to 27°C), which covers the range of most indoor environments year-round. Overwatered soil also develops anaerobic zones where beneficial bacteria can’t survive, leaving roots with no biological defense. Pots without drainage holes accelerate this: standing water at the base raises moisture throughout the root zone within 24 hours of watering, even when the surface appears dry.
The most common reasons monstera root rot starts:
- Watering on a fixed schedule regardless of soil moisture
- Pots without drainage holes, or saucers left full of water
- Dense potting mix that holds moisture too long
- Repotting into a pot that’s too large (more soil mass than the roots can dry out)
- Low light combined with overwatering (the plant uses less water when it gets less light)
How to Identify Monstera Root Rot Before It’s Too Late
Early root rot looks a lot like underwatering, which is why most people water more and make things worse. The key difference is context: if the soil is moist and the plant still looks sick, drought stress is off the table.
Signs that point specifically toward root rot:
- Yellowing leaves despite wet soil. Healthy roots pull nutrients from moist soil. Rotted roots can’t, so leaves go yellow even when water is available.
- Wilting that doesn’t bounce back after watering. A thirsty monstera perks up within a few hours. A plant with root rot stays limp.
- Foul smell from the pot. Healthy potting soil smells earthy. Rot smells sulfurous or like stagnant water.
- Soft or discolored stem base. If the stem feels mushy at soil level, rot has already traveled up.
- Black or brown, slimy roots. Healthy monstera roots are white to light tan and snap back when bent. Rotted roots are dark, slimy, and fall apart when touched.
If you’re unsure, the only reliable way to check is to slide the plant out of the pot and look at the roots directly. Our guide on overwatered vs underwatered plant covers how to read the early surface symptoms before you get to that point.
How to Save Monstera Root Rot: Step-by-Step
Work on a flat surface covered with newspaper or an old towel. Have sterilized scissors or pruning shears, a bowl of diluted hydrogen peroxide, a clean pot, and fresh potting mix ready before you start.
Step 1: Unpot the plant. Tip the pot sideways and ease the root ball out gently. Don’t yank the stem. Set the root ball on the newspaper.
Step 2: Shake off all the old soil. The existing mix contains fungal spores. Get as much of it off the roots as possible. Squeeze and crumble the clumps away by hand.
Step 3: Rinse the roots. Run the root ball under cool water to wash away the last of the soil. Now you can see clearly what you’re working with.
Step 4: Cut away every rotted root. Sterilize your scissors with rubbing alcohol first. Snip off anything that’s black, brown, mushy, or slimy. If a root bends without springing back, cut it. Keep going until only firm, white or tan roots remain. When something looks borderline, cut it anyway. Leaving infected tissue behind means the rot continues after repotting.
Step 5: Treat the remaining roots. Mix 1 part 3% hydrogen peroxide with 2 parts water in a bowl. Submerge the healthy roots and let them soak for 5 minutes. This kills surface-level fungal spores. After soaking, set the root ball on a dry towel and let it air out for 30 to 60 minutes before repotting. Some growers dust the cut surfaces lightly with ground cinnamon, which has mild antifungal properties, as an extra step.
Step 6: Repot in fresh, clean soil. Use a clean pot (scrubbed with hot water and dish soap if it held the infected plant before). If you removed a large portion of roots, go down one pot size. A smaller root system can’t draw moisture from a large soil volume quickly enough, and that puts you right back in the same situation.
What Soil Mix to Use After Treating Root Rot
Standard potting mix alone holds too much moisture for a monstera recovering from root rot. The roots need oxygen more than they need water right now.
A reliable mix: 60% quality potting soil, 30% perlite, 10% orchid bark. The perlite opens up air pockets and carries excess water through quickly. The orchid bark adds structure and prevents the mix from compacting over time.
Avoid pure sphagnum moss or straight coco coir as the base. Both retain moisture too well and set up the same wet conditions that caused the problem. If you want to add either, keep it under 10% of the total mix.
How to Water Your Monstera After Root Rot
Hold off on watering for 3 to 4 days after repotting. The trimmed roots need time to callous over the cut surfaces, and any remaining fungal activity needs to dry out.
When you resume, use one rule: water only when the top 2 inches of soil are dry. Stick a finger in, or use a wooden skewer (it comes out clean when the soil is ready). In spring and summer, that’s usually every 7 to 14 days. In winter, it can stretch to 3 to 4 weeks.
Terracotta pots make this easier. The porous walls wick moisture away from the soil faster than plastic or ceramic, and a dry terracotta pot lightens in color when the soil inside is getting close to ready.
Drainage holes are non-negotiable going forward. If a pot doesn’t have them, repot into one that does. Decorative cachepots (the outer pot without holes) are fine as long as you empty any water that collects in them within an hour of watering.
Skip fertilizer for at least 6 weeks. The recovering root system can’t process nutrients efficiently, and salt buildup from fertilizer adds stress to roots that are already damaged.
When Root Rot Has Gone Too Far
Not every monstera pulls through. If the rot has spread throughout the root system or traveled into the stem, the recovery odds drop sharply.
Signs that the plant is unlikely to make it:
- More than 70% of the root mass is black and mushy, with no firm white roots anywhere
- The main stem is soft, collapsed, or discolored several inches above the soil line
- The crown (the central growing tip) shows no firmness or green color
If the crown is still alive and a few healthy roots remain, repot and give it 8 to 12 weeks under the right conditions. Some plants come back from very little.
If stem rot has traveled up but healthy tissue is visible above the damaged section, take a stem cutting just above the rot. Root it in a jar of water or moist perlite in bright indirect light. That’s sometimes the only way to save the plant’s genetics when the root system is gone.
How PlantlyAI Helps You Diagnose and Treat Root Rot
Monstera symptoms overlap. Yellowing leaves and drooping can come from root rot, nutrient deficiency, too little light, or cold drafts. Getting the diagnosis right changes what you do next.
PlantlyAI lets you snap a photo of your sick monstera and get an AI diagnosis in seconds. The app identifies the likely cause of the symptoms and delivers a step-by-step treatment plan with organic, biological, and chemical options. It’s free to start with 2 diagnoses a day, no account required, and it works for houseplants, vegetables, trees, and garden plants.
If you’re not sure whether the problem is root rot or something else before you unpot, a photo diagnosis takes less than a minute and points you in the right direction. The built-in plant disease library also lets you cross-reference symptoms when they don’t clearly fit one cause. See a full breakdown of tools that help with sick plants in our guide to apps that tell you what’s wrong with your plant.
Frequently Asked Questions
How long does it take for monstera to recover from root rot?
Most monsteras with mild to moderate root rot show new growth within 4 to 8 weeks of repotting. Expect a quiet period first: no new leaves while the root system rebuilds. Keep watering minimal, give it bright indirect light, and avoid fertilizing for at least 6 weeks. Patience matters more than intervention during this phase.
Can a monstera recover if it only has a few roots left?
A monstera can recover with very few roots if those remaining roots are truly healthy (firm, white, undamaged) and the conditions are right: fast-draining soil, minimal watering, bright indirect light, and no fertilizer for 6 to 8 weeks. Give it 2 to 3 months before writing it off. Some plants surprise you.
Should I use hydrogen peroxide or a fungicide for monstera root rot?
Both work. Hydrogen peroxide (1 part 3% solution to 2 parts water) is readily available and effective against surface fungal spores. Commercial fungicides containing copper or thiophanate-methyl go deeper and are a better choice if root rot was severe or if the plant has had root rot before. For a first case with significant healthy root tissue remaining, hydrogen peroxide is usually enough.
Do I need to replace the pot after treating root rot?
If the pot held the infected plant, wash it thoroughly with hot water and dish soap before reusing. Fungal spores persist on plastic and ceramic surfaces. Terracotta pots are harder to sterilize because spores can embed in the porous material; replace them if the infection was severe. A clean new pot is always the safer choice.
Can monstera recover from stem rot?
Stem rot above the soil line is harder to reverse than root rot alone. If the damaged section is limited to the base and healthy tissue is visible above it, a stem cutting taken just above the rot can be propagated in water or moist perlite. If the rot extends several inches up the stem with no firm green tissue above it, the plant is unlikely to recover.
If your monstera is showing signs of root rot and you want to confirm before cutting roots, take a photo with PlantlyAI. The app diagnoses plant problems from a single photo and gives you a step-by-step treatment plan, including organic and chemical options. Download free for iOS or Android and use 2 free diagnoses a day with no account needed.
Not sure what's wrong? Diagnose your plant free
Upload a photo to our free plant disease identifier and get an instant diagnosis.