Monstera Stem Rot: Why Stems Go Mushy and How to Fix It
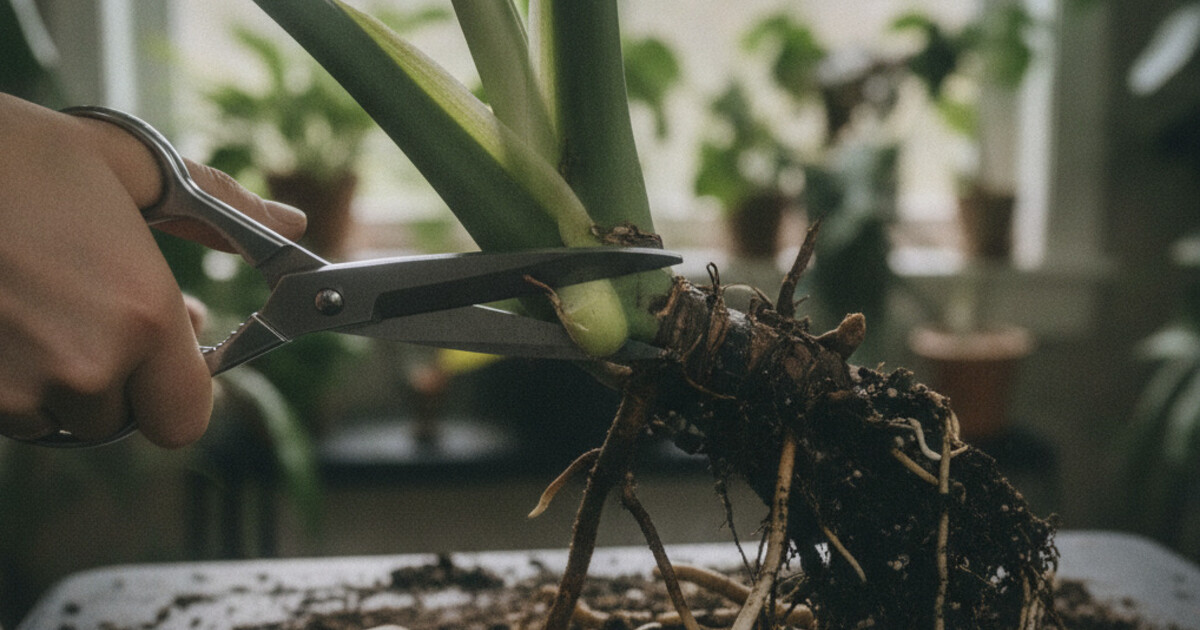
A healthy monstera stem is firm and bright green. When stem rot sets in, the same stem goes soft, dark brown, and collapses between your fingers. The smell is a giveaway too: sour and fermented, nothing like a healthy plant.
Monstera stem rot spreads faster than root rot. Where root rot works upward slowly from the roots, stem rot can travel through a node and kill an entire section of the plant within 48 hours. Knowing what to look for and acting fast are the only things that save it.
Monstera stem rot causes mushy, collapsing stems due to Pythium and Phytophthora water molds that thrive in waterlogged soil. Cut the affected stem 2 to 3 inches above the rot line with sterile scissors, treat the cut with powdered cinnamon or diluted hydrogen peroxide, and repot in fresh, perlite-heavy mix. Never reuse old soil or an unwashed pot.
What Causes Mushy Stems on Monstera
Mushy stems almost always trace back to one trigger: soil that stays wet too long.
Pythium and Phytophthora, the water molds responsible for most houseplant stem rot, don’t need much to get started. They’re already present in most potting mixes, sitting dormant until conditions turn in their favor. Once the soil stays saturated and oxygen drops out of the root zone, they activate and move fast.
Monstera deliciosa is native to southern Mexico and Central America, where it grows on forest floors with high humidity but excellent drainage. In its natural habitat, soil dries between rain events. In pots, the same plant suffers when roots sit in standing water for more than a few days. Pythium and Phytophthora colonize roots within 24 to 48 hours of anaerobic conditions (water displaces oxygen from the soil). From the roots, these molds travel up the stem through vascular tissue. At soil temperatures above 68°F (20°C) and soil moisture above 80% saturation, Pythium spreads at roughly 2 to 4 centimeters per day through stem tissue. Symptoms appear as brown or black discoloration, then softening, then collapse. By the time a stem looks mushy on the outside, the internal tissue has already died several centimeters above the visible rot line. Cutting 2 to 3 inches above the visible rot is essential for this reason.
Overwatering is the most common trigger, but it’s not the only one. Pots without drainage holes trap water with nowhere to go. Dense potting mixes without perlite stay wet for weeks. Cold soil below 60°F (15°C) slows root metabolism so water isn’t absorbed efficiently, and wet cold soil is a perfect environment for rot pathogens.
A few patterns that set up stem rot:
- Watering on a fixed schedule rather than checking soil moisture first
- Leaving the monstera in a decorative pot with no drainage inside a cachepot
- Repotting into soil that’s too dense, like pure garden soil or heavy compost
- Letting the plant sit in a saucer of standing water after watering
For a clearer picture of whether your monstera is struggling with too much water vs. too little, Overwatered vs Underwatered Plant: How to Tell walks through the side-by-side comparison.
How to Identify Monstera Stem Rot
The first sign is usually a dark, discolored patch near the soil line. Press it gently with your finger. If it gives way and feels like wet cardboard, that’s rot.
Above-soil stem rot shows clear visual symptoms:
- Dark brown or black discoloration starting near the soil and moving up
- Soft, mushy texture that collapses under gentle pressure
- A sour or fermented smell from the stem or soil
- Yellowing or wilting leaves above the affected section, even when the rest of the plant looks fine
Below-soil stem rot is harder to catch. Unpot the plant and check where the stem meets the root system. If the stem base is dark, soft, and separates from the roots easily, the rot started underground and has already traveled up.
One signal many people miss: a single leaf or stem section drooping suddenly while the rest of the plant stays healthy. When rot cuts off the vascular connection to one section, that section wilts within hours. People often water more in response, which speeds up the rot.
Look also at the cross-section when you cut. Healthy stem tissue is white or pale green inside with no discoloration. Brown or gray rings, streaks, or a dark center mean the rot has moved through that tissue even if the outer surface looks firm.
How to Save a Monstera with Stem Rot (Step by Step)
Speed matters here. Every hour you wait gives the rot more material to work through.
Step 1: Unpot the plant completely. Pull the monstera out of its pot so you can see the full extent of the rot below the soil line. Treating while the plant is still potted doesn’t work.
Step 2: Remove all rotted stem and root tissue. Use clean, sharp scissors or pruning shears. Cut 2 to 3 inches above the highest point where the stem is still mushy or discolored. When you look at the cut surface, the center should be white or pale green. If it’s brown or gray, cut again higher up until you reach clean tissue. Do the same with roots: trim back to where they’re firm and white.
Step 3: Treat the cut surfaces. Dust the cut stem with powdered cinnamon, which works as a natural antifungal. Alternatively, dip the cut in a diluted hydrogen peroxide solution (1 part 3% peroxide to 10 parts water). Let the cut sit exposed to air for 20 to 30 minutes to dry slightly.
Step 4: Clean and disinfect the pot. Scrub the pot with hot soapy water. Then rinse with a diluted bleach solution (1 part bleach to 9 parts water) and let it dry completely. Skipping this step reintroduces the same pathogens to fresh soil.
Step 5: Repot in fresh, fast-draining mix. Never reuse old soil from a rotted plant. A good monstera recovery mix: 60% indoor potting soil, 30% perlite, 10% orchid bark. This drains fast enough to keep oxygen in the root zone between waterings.
Step 6: Water once, then hold back. Give the plant a light watering to settle the soil, then wait. Only water again when the top 2 to 3 inches of soil are completely dry. For most indoor environments, that’s 10 to 14 days in summer and longer in winter.
Step 7: Give it warmth and indirect light. Place the plant in a spot with bright indirect light and temperatures between 65 and 80°F (18 to 27°C). Skip fertilizer for 4 to 6 weeks. A stressed plant with damaged roots can’t absorb nutrients, and fertilizer salts will burn the recovering root system.
Most monsteras stabilize within 2 to 4 weeks after a clean rescue. New leaf growth is the sign the roots have recovered.
When the Rot Has Gone Too Far: Propagate from a Healthy Cutting
Sometimes the rot has consumed the main stem and there’s no clean tissue left to save. That doesn’t mean the plant is gone.
Look for stem cuttings that have at least one node (the raised bump where a leaf and aerial root emerge). If the cutting is firm, green, and smells clean, it can grow a new plant.
Cut at least 2 inches above any visible rot. Let the cutting dry for 30 to 60 minutes. Then place it in a jar of water or a container of moist sphagnum moss, with the node submerged and the leaf in the air. New roots typically appear in 2 to 4 weeks in a warm, bright spot.
This takes longer than rescuing the original plant, but it’s reliable. Monstera propagates easily from healthy cuttings as long as the cutting itself is free of infection. Once roots reach 2 to 3 inches long, pot the cutting in the same perlite-heavy mix described above.
How PlantlyAI Can Help You Catch It Earlier
The tricky part of monstera stem rot is that early symptoms look almost identical to underwatering: drooping leaves, slight yellowing, a plant that looks stressed. People water more, which makes the rot worse.
PlantlyAI diagnoses plant problems from a single photo. Snap a picture of the affected stem or leaf, and the app identifies the cause and gives you a step-by-step treatment plan. It covers overwatering, rot, pests, nutrient deficiencies, and more across houseplants, garden plants, vegetables, and crops. The difference between rot and drought stress shows up clearly in the diagnosis before you take any action.
Two diagnoses per day are free with no account needed. Download PlantlyAI on the App Store or Google Play and photograph your monstera before you start cutting.
Frequently Asked Questions
Can a monstera recover from stem rot?
Yes, if you catch it before the rot reaches the growing crown. Cut all infected stem tissue back to clean, firm material, remove any rotted roots, and repot in fresh fast-draining mix. Plants with localized stem rot on one section often recover and push out new leaves within 4 to 6 weeks. If the rot has reached the base of all main stems, take healthy cuttings and propagate instead.
What does rotted monstera stem look like inside?
Cut a small cross-section of the stem and look at the center. Healthy stem tissue is white or pale green throughout. Rotted tissue shows brown or gray discoloration, often in rings or streaks radiating from the center. If you see any dark coloring inside, the rot has already moved through that section even if the outside still feels firm.
Why does my monstera stem rot keep coming back?
The most common reason is reusing old soil or an unwashed pot. Pythium and Phytophthora spores survive in contaminated soil for months. Always start with fresh, perlite-heavy mix, disinfect the pot with diluted bleach, and make sure the pot has drainage holes. Watering on a fixed schedule instead of checking soil moisture first also causes repeat rot.
Is monstera stem rot the same as root rot?
They’re caused by the same pathogens (Pythium and Phytophthora) and the same underlying problem: waterlogged soil. Root rot stays below the soil line. Stem rot is what happens when the infection spreads from the roots up into the stem tissue. Both often occur together. If the stem above soil is mushy, root rot has already progressed to stem rot and needs more aggressive cutting.
How do I prevent monstera stem rot?
Wait until the top 2 to 3 inches of soil are completely dry before watering. Use a pot with drainage holes. Mix perlite into the potting soil at a ratio of at least 30%. Don’t let the plant sit in standing water in a saucer. For the full root-level rescue if rot has already progressed below soil, How to Save Monstera Root Rot has a dedicated step-by-step guide.
Not sure what's wrong? Diagnose your plant free
Upload a photo to our free plant disease identifier and get an instant diagnosis.