How to Save a Dying Orchid (Step-by-Step)
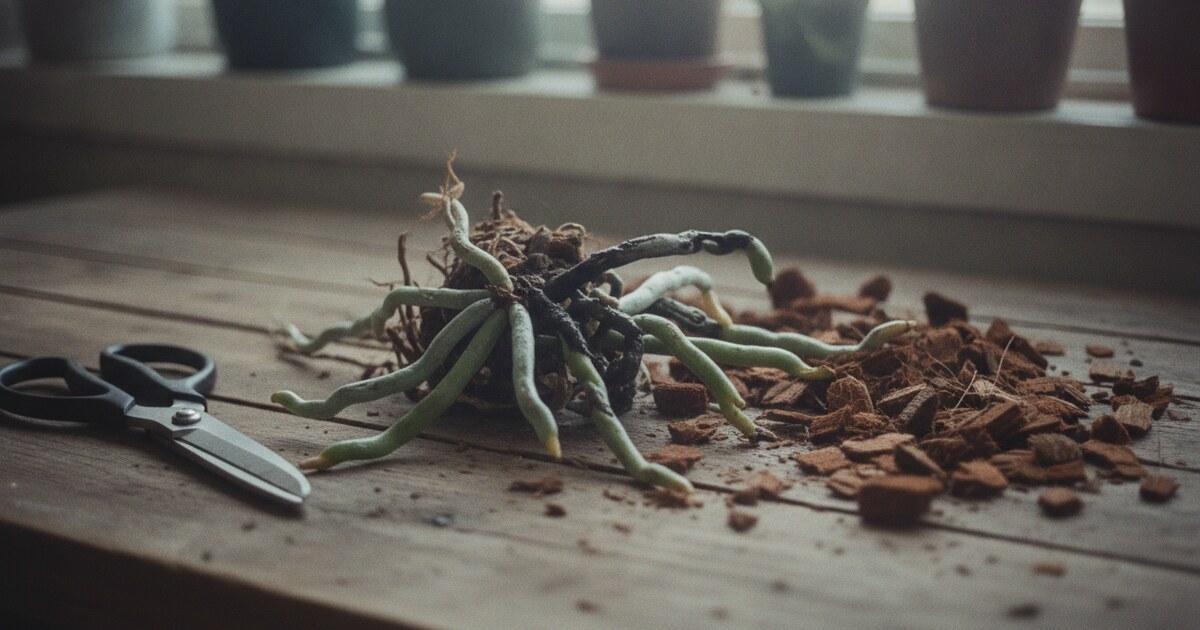
Your orchid was doing fine a few weeks ago. Now the leaves are turning yellow, the bark smells off, or the roots look dark and collapsed inside the pot. You’re wondering if you can save a dying orchid or if it’s already too far gone.
Orchids have a reputation for being delicate, but most of them don’t die outright. They go quiet, suffer a slow overwatering problem, or get stressed by the wrong environment. As long as the crown (the flat center growing point) is still firm and a few roots still turn green when watered, the plant is alive and can recover. What looks like a dead orchid is usually a stressed one.
This guide covers how to save a dying orchid: identify what went wrong from the symptoms, then follow the specific fix for that cause.
To save a dying orchid, check the roots first. Healthy roots are firm and turn bright green after watering; rotted roots are dark brown and mushy. Cut away all dead roots, treat with diluted hydrogen peroxide, and repot in fresh orchid bark. Most orchids with 3 or more green roots recover within 8 to 12 weeks.
Is Your Orchid Actually Dying?
Before doing anything, press the crown gently with a fingertip. The crown is the flat center of the plant where new leaves emerge. If it feels firm and the tissue inside looks pale green or white, the plant is still alive. A crown that collapses under light pressure or has turned dark and wet has started to rot, which is covered in the crown rot section below.
Then pull the plant out of its pot and check the roots.
Orchid root condition is the most reliable indicator of whether a plant can be saved. Healthy phalaenopsis roots are firm and cylindrical, appearing white or silver when dry and turning bright green within seconds of watering. Roots showing tan or brown coloring but still firm may be in early decline but still contain viable tissue. Roots that are uniformly dark brown or black and collapse under light pressure are fully dead and need to come off completely. In a typical overwatered phalaenopsis, the root system can be 60 to 80 percent compromised before any yellowing appears on the leaves. The practical recovery threshold is 3 firm, green roots: plants meeting that minimum can recover in a standard pot. Plants with fewer than 3 viable roots do better in a humidity chamber while they rebuild. Crown rot moves faster, typically destroying the growing point within 2 to 3 weeks from first appearance if left untreated.
An orchid with no flowers, no new leaves, and roots that still turn green when watered is resting between bloom cycles. Orchids naturally go quiet for months after flowering, especially in lower-light winter conditions. If the roots pass the green test, put it in a bright window and wait.
Why Orchids Die: The Most Common Causes
Orchids fail for a short list of repeating reasons. Matching symptoms to the cause tells you which fix to follow.
Overwatering and root rot is the single most common killer. Phalaenopsis orchids grow naturally on tree bark in humid forests, so their roots need air as much as moisture. A pot of wet bark with no drainage suffocates roots within days, and fungal rot sets in fast. Symptoms: dark, mushy roots; a sour or musty smell from the pot; yellowing lower leaves that feel soft or limp; potting medium that never dries out. If you’ve been watering more than once a week or leaving the pot in a water-filled saucer, this is almost certainly the cause. See our guide on overwatered vs underwatered plant if you’re not sure which problem you’re looking at.
Underwatering and dehydration is less common but easy to misread. Symptoms: leaves that are wrinkled and accordion-folded lengthwise, roots that look flat and papery rather than plump, and roots that stay silver-white even after watering because they can no longer absorb water efficiently.
Crown rot usually starts when water sits in the center of the plant, often from watering from above. Symptoms: the innermost leaves turn yellow first, the tissue at the base of those leaves feels soft, and the collapse spreads outward quickly.
Temperature stress. Orchids do best between 60 and 85°F (15 to 29°C). Temperatures below 55°F (13°C) damage the root system and slow recovery. Cold drafts from windowsills or air conditioning vents are common culprits in winter.
Pests and disease. Mealybugs and scale can cause leaf yellowing and sticky residue. Fungal infections cause spreading dark spots on leaves and can move into stems. If you’re seeing unusual marks or textures alongside the general decline, check our guides on mealybugs on orchids and black spots on orchid leaves before starting the root rescue process. Treating a pest or infection first prevents reinfection after repotting.
How to Save a Dying Orchid with Root Rot (Step-by-Step)
Root rot is fixable in most cases if you act before the crown softens. Work through these steps in one sitting.
Step 1: Unpot the plant. Tip the pot sideways and ease the root ball out. If the roots are tangled into the bark, soak the whole pot in water for 5 minutes first so the medium loosens and releases without tearing healthy roots.
Step 2: Rinse and inspect. Hold the root ball under lukewarm running water and remove all the old bark. You need to see every root clearly. White or silver when dry and bright green after water contact means viable. Brown, black, soft, or collapsing means it comes off.
Step 3: Cut away dead roots. Use clean scissors or pruning shears. Cut each dead root back to where it meets firm, healthy tissue. If the rot runs right to the base, cut it flush. Don’t leave stubs; they harbor fungal spores. Dust the cut ends with powdered cinnamon (a natural antifungal) and let them air-dry for 15 to 20 minutes.
Step 4: Treat with hydrogen peroxide. Mix 1 part 3% hydrogen peroxide with 3 parts water. Pour it over the trimmed roots and let it fizz for 2 to 3 minutes. This kills remaining fungal spores without harming surviving tissue.
Step 5: Repot in fresh orchid bark. Use a bark-based orchid mix (medium-grade bark chips, no potting soil; soil smothers orchid roots). Choose a pot only slightly larger than the trimmed root ball. Clear plastic pots with multiple drainage holes let you monitor root color without unpotting.
Step 6: Hold off on watering. Don’t water for the first 5 to 7 days after repotting. This lets the cut root ends callous over. Then water by submerging the pot in a container of room-temperature water for 15 minutes, draining fully, and repeating only when the bark is dry to the touch.
How to Revive a Dehydrated Orchid
A dehydrated orchid has the opposite problem from an overwatered one, but it can look similar from the outside: limp leaves, apparent collapse. The key difference is in the roots. Dehydrated roots are flat and papery, not mushy. They stay silver-white after watering because they can’t absorb water efficiently anymore.
The fix is a long soak. Submerge the entire pot in a container of room-temperature water for 30 to 45 minutes. This lets the bark medium and the roots absorb moisture slowly. Lift the pot out, drain it fully, and place it in bright indirect light.
For roots that are close to paper-dry, wrap them in damp sphagnum moss before repotting. The moss holds humidity against the roots for several days and gives them time to rehydrate before they face open-air conditions again.
Repeat the soak every 7 to 10 days while the plant recovers. Wrinkled, accordion-folded leaves typically plump back up within 2 to 3 weeks once the root system is rehydrated.
How to Treat Crown Rot in Orchids
Crown rot moves fast. Treat it the same day you spot soft or discolored tissue at the growing center.
Move the plant somewhere with low humidity and good airflow immediately. Crown rot spreads faster in still, humid air.
Let the crown air-dry completely. If there’s water pooled in the center, tip the plant gently and dab with a dry paper towel to remove it.
Apply powdered cinnamon directly to the affected tissue. Cinnamon acts as a natural antifungal and slows the spread. Cover the entire soft area.
If the rot has spread more than a centimeter into the crown, cut away the affected tissue with a sterile blade, dust with cinnamon, and allow 24 hours to callous before any watering.
After treatment, always water at the base of the plant. Don’t pour water into the crown.
An orchid that loses its entire crown won’t push new leaves from the same growth point, but the roots may produce a keiki (a baby offset plant) over the following months if kept healthy and well-lit.
How PlantlyAI Helps Diagnose Your Orchid
The hardest part of saving a dying orchid is getting the diagnosis right. Root rot and dehydration both cause limp leaves and apparent decline, but the fixes are opposite. Treating an underwatered orchid with less water makes it worse. Soaking a root-rotted orchid causes more rot.
PlantlyAI removes that guesswork. Take a photo of the affected leaves, roots, or crown, and the app identifies the specific problem: root rot from overwatering, a fungal infection, a bacterial crown issue, or a pest causing secondary damage. It then gives you a step-by-step treatment plan with organic, biological, and chemical options so you can use what’s available.
The app covers houseplants, garden plants, vegetables, and crops. If you have several plants showing problems, 2 free diagnoses a day means you can work through them without a subscription. No account needed to start.
Frequently Asked Questions
Can a dead orchid come back to life?
It depends on what “dead” means. An orchid with no flowers and no new leaves but with firm, green-capable roots is dormant and will rebloom with patience. An orchid with a fully rotted crown and zero viable roots usually can’t be revived. Check the crown first: firm and pale green inside means there’s still something to work with.
Why are my orchid’s leaves turning yellow?
The most common cause is overwatering leading to root rot, but underwatering, insufficient light, natural aging of lower leaves, and fertilizer salt buildup can also cause yellowing. Single lower leaf yellowing as a plant grows is normal. Multiple leaves yellowing at once, especially with soft texture, points to root rot or root loss.
How long does it take an orchid to recover from root rot?
After repotting, most orchids stabilize within 4 to 6 weeks: roots stop declining and the plant holds its remaining leaves. New root and leaf growth typically appears at 8 to 12 weeks. Reblooming takes longer, often 6 to 12 months after a root rot rescue, as the plant prioritizes root rebuilding before flowers.
How do I know if my orchid needs repotting?
Repot when roots are growing over the rim of the pot, when the bark has broken down into fine, moisture-retaining dust, or when roots are clearly rotting in a mix that won’t drain. Most orchids in bark mixes need repotting every 18 to 24 months regardless of root health, because bark decomposes and starts behaving like soil.
Can I save an orchid with no roots?
Sometimes. An orchid that has lost all its roots but still has a firm, intact crown can be placed in a humidity chamber (a clear bag over a pot of barely damp sphagnum moss) and may generate new roots over 6 to 12 weeks. Keep it in bright indirect light and check weekly. Success isn’t guaranteed, but it’s worth trying before composting.
If your orchid has symptoms you can’t quite identify (yellowing leaves, mushy roots, or spreading spots), take a photo with PlantlyAI. The app pinpoints the exact problem and gives you a treatment plan specific to what’s actually wrong. Start with 2 free diagnoses a day on iOS or Android.
Not sure what's wrong? Diagnose your plant free
Upload a photo to our free plant disease identifier and get an instant diagnosis.